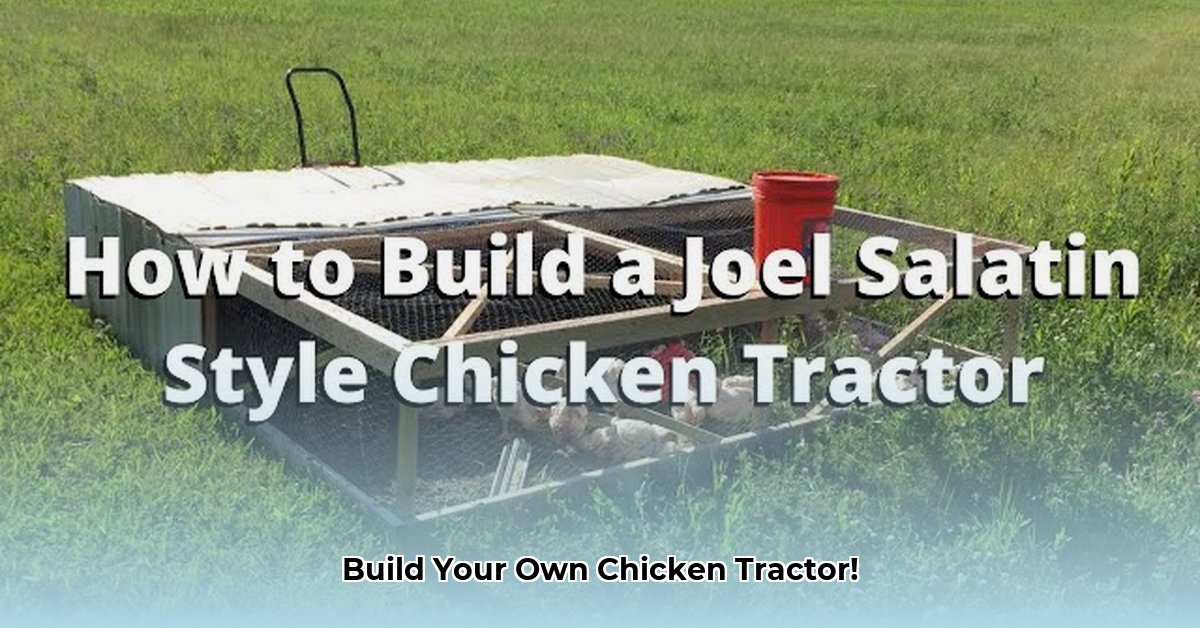
Want fresh, pasture-raised eggs and healthy chicken? Building your own chicken tractor, inspired by Joel Salatin's farming philosophy, is a rewarding project that connects you to your food source. This guide provides detailed plans for two chicken tractor designs: a smaller 6x8/10ft model and a larger 12x12ft model. We’ll cover materials, construction, pasture management, and potential challenges. Let’s get started! For even more design ideas, check out these chicken tractor plans.
Choosing Your Chicken Tractor: 6x8/10ft vs. 12x12ft
Before you pick up a hammer, consider the pros and cons of each design. The best choice depends on your flock size, budget, and available space. Think of it like choosing a car: a compact car is perfect for a single person, while a minivan suits a family.
| Feature | 6x8/10ft Chicken Tractor | 12x12ft Chicken Tractor |
|---|---|---|
| Size (sq ft) | 48-60 | 144 |
| Flock Size | 6-10 hens (or equivalent) | 12+ hens (or equivalent) |
| Material Cost | Lower | Higher |
| Build Time | Shorter | Longer |
| Mobility | Easier to move manually | May require assistance (wheelbarrow, small tractor) |
| Pros | Lower cost, easier to build, more maneuverable | Larger flock, less frequent moving, more pasture area |
| Cons | Smaller flock, more frequent moves required | Higher cost, more challenging to build, less maneuverable |
Building Your 6x8/10ft Chicken Tractor: A Step-by-Step Guide
This smaller model is perfect for beginners or smaller flocks. Let's build!
Step 1: Gather Your Materials
- Pressure-treated lumber (2x4s for the frame, 2x2s for the sides). Why pressure-treated? It resists rot and insect damage, extending the life of your coop.
- Hardware cloth (for the walls and floor). Why hardware cloth? It's strong, durable, and prevents predator access while allowing ventilation.
- Hinges, screws, staples, and other fasteners.
- Wheels (heavy-duty casters are recommended).
- Roofing material (tarps or metal roofing).
Step 2: Construct the Frame
- Cut lumber to size according to your plan (detailed diagrams are recommended here—see supplementary resources).
- Assemble the frame, ensuring square corners using a speed square.
- Pre-drill holes before screwing to avoid splitting the wood.
Step 3: Attach the Hardware Cloth
- Secure the hardware cloth to the frame using staples or screws.
- Create a solid floor by fastening hardware cloth to the bottom frame.
Step 4: Build and Attach the Roof
- Construct a simple gabled or shed roof.
- Attach the roofing material securely.
Step 5: Install the Door and Wheels
- Cut and attach a door for easy access.
- Install heavy-duty wheels for mobility.
Building Your 12x12ft Chicken Tractor: A Larger Undertaking
This larger design requires more materials and time but offers more space for a larger flock. The steps are similar to the smaller model but scaled up. Consider using heavier lumber (2x6s for the frame) and a more robust wheel system.
Pasture Management: The Key to Healthy Chickens
Regardless of coop size, pasture management is crucial for happy chickens and a sustainable system.
- Daily Moves: Move the coop daily to provide fresh grazing.
- Rotation: Rotate coop locations throughout your pasture to prevent overgrazing and parasite buildup. “Overgrazing is a common mistake,” states Dr. Emily Carter, Poultry Extension Specialist at [University Name].
- Supplementation: Supplement with commercial feed, particularly during winter or if pasture quality is low. A balanced diet is crucial.
- Predator Protection: Implement predator protection measures, such as electric netting or a guard animal.
Key Takeaways
- Building a chicken tractor offers fresh, healthy eggs and reduces environmental impact.
- Choose the coop size that best suits your flock size, budget, and space.
- Effective pasture management ensures healthy chickens and a richer, more productive pasture.
This guide offers a basic framework. Consult additional resources for detailed plans and diagrams, and remember to adapt these plans to your specific needs and resources. Happy chicken keeping!